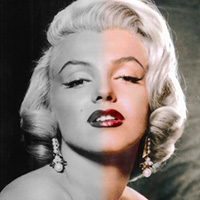
如何使用Removebg进行图片背景更换?以下是详细步骤:
一、注册并获取API KEY
- 打开Removebg-智汇AI,进入Removebg的官网,进行注册并登录。
- 注册完成后,可以在“我的账户”中查看并获取API KEY。这个KEY是后续使用Removebg API进行图片背景更换的必要凭证。
二、安装Removebg库
- 如果你是使用Python进行图片处理,那么需要先安装Removebg库。可以通过pip命令进行安装:
bash复制代码pip install removebg |
三、使用Removebg进行图片背景更换
-
基本使用
在Python脚本中,导入Removebg库,并使用你的API KEY创建一个RemoveBg对象。然后,使用
remove_background_from_img_file方法从文件中移除背景。python复制代码from removebg import RemoveBg# 替换为你的API KEYrmbg = RemoveBg("YOUR_API_KEY", "error.log")# 替换为你的图片文件路径rmbg.remove_background_from_img_file("your_image.png")注意:这里的
your_image.png应替换为你想要处理的图片文件路径。 -
更换背景颜色
如果你想要更换背景颜色,可以在移除背景后,使用PIL(Python Imaging Library)库来创建一个新的图像,并将无背景图像粘贴到新的图像上。以下是一个示例代码:
python复制代码from removebg import RemoveBgfrom PIL import Image# 替换为你的API KEYrmbg = RemoveBg("YOUR_API_KEY", "error.log")# 替换为你的图片文件路径和输出文件路径file_in = "your_image.png"file_out = "your_image_with_new_background.png"# 移除背景并保存为无背景图像rmbg.remove_background_from_img_file(file_in)file_no_bg = "{}_no_bg.png".format(file_in.split(".")[0]) # 假设输出为PNG格式# 打开无背景图像no_bg_image = Image.open(file_no_bg)# 创建一个新的图像,背景颜色为蓝色(例如)# 你可以根据需要更改颜色值color = (0, 125, 255) # 蓝色new_image = Image.new('RGBA', no_bg_image.size, color=color)# 将无背景图像粘贴到新的图像上new_image.paste(no_bg_image, (0, 0), no_bg_image)# 保存新的图像new_image.save(file_out)注意:在这个示例中,我们假设输出的无背景图像是PNG格式。你可以根据实际情况进行调整。同时,背景颜色可以根据你的需求进行更改。
-
处理多张图片
如果你需要处理多张图片,可以使用循环来遍历图片文件列表,并对每张图片进行背景移除和更换操作。
四、注意事项
- Removebg提供了免费试用和付费服务。免费试用有一定的限制,如图片大小和数量等。如果需要处理更多或更高质量的图片,请考虑购买付费服务。
- 在使用Removebg进行图片处理时,请确保你的网络连接稳定。因为Removebg是一个在线服务,需要上传和下载图片数据。
- 在处理敏感或私有图片时,请注意保护你的隐私和数据安全。
通过以上步骤,你就可以使用Removebg轻松实现图片背景更换了。
相关推荐